Tag Archives: Cheddar Cheese

Mac & Cheese – An All-Time Favourite Made Better

Kraft Dinner or KD for short is a staple food in Canada. Really, it is! But when you have lived abroad for most of your life, KD is something you do not come by often.

Since I’ve learnt how to cook (thanks Mr. de Vries!), I’ve been experimenting in the kitchen. Lately I’ve been craving for macaroni and cheese and I finally got around to making it, though it is no KD. But that’s alright, I’ve learnt that I shouldn’t compare things. I mean it annoys the hell out of me when those around me do it. So why should I?

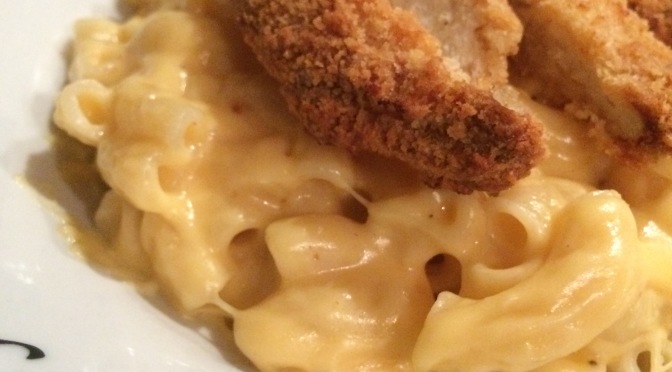
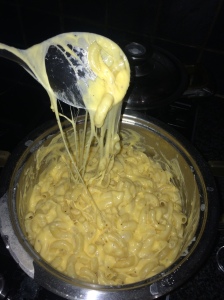
Well this macaroni and cheese was the cheesiest thing I’ve ever really seen. But it was great! And probably ten times better than KD. No preservatives or powdered this or that’s in it makes for a better dish anyway, right? If and when I have kids I will try to show them that although box food is nice, the real deal is better. Like older women from the Bronx tell off anyone who makes “fake” dishes for their kids (I’m picturing a woman with a thick almost Italian accent). Well I will be one of those people… well maybe. We’ll see when I finally do have children.

Macaroni & Cheese

Anyway I got the recipe from Chocolate, Chocolate & More, a cute little website I got through Pinterest. The direct link for the recipe can be found here. It is the easiest recipe which I followed almost perfectly. The only thing I changed was the use of flour. I unfortunately found flour mites in our flour. Has anyone else ever encountered these pests? Horrible things!

Ingredients:

  • 2 cups (226g) uncooked elbow macaroni
  • 2 Tablespoons corn starch
  • 2 Tablespoons unsalted butter
  • 1 ½ cup (420ml) milk (I used whole milk)
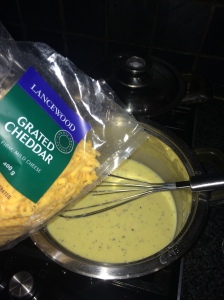
  • 2 cups (200g) grated cheddar cheese
  • ½ teaspoon salt
  • Pepper to taste

Instructions:

  1. Cook macaroni as instructed on packaging until al dente. Drain and set aside.

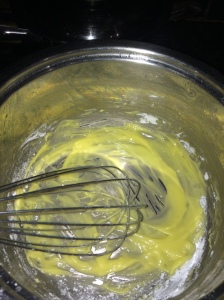
  2. In same pot at low heat, melt butter and whisk in flour until a smooth paste. Slowly pour in milk, make sure that the milk and butter have completely blended together before adding remainder of milk.Butter and Corn Starch MixtureMilk and Butter mixture

  3. Once milk and butter are fully incorporated, add in cheese, salt, and pepper. Mix until cheese is fully melted.Cheese in Milk Mixture

  4. Add cooked macaroni and toss to coat.Homemade Macaroni

  5. Serve immediately!

When I whisked the butter and maizena, I thought back to my second year of college where we learnt about making a roux for gravy or soup. Although making a roux can be difficult as it is easy to burn, once you get a hang of it it can make a perfect gravy or soup!

But I can say that at first I wasn’t sure if the milk and cheese was going to mix properly but when I finally added the last bit of cheese, the milk and cheese mixture combined perfectly making a wonderful thick liquid.Thick cheese and milk mixture

So like I said, this isn’t like the typical box macaroni and cheese, BUT it is better! Less artificial! Which in my eyes is far better than anything artificial.

I’m not sure about y’all, but cutting out artificial food and drinks makes me actually able to taste the fake food and drink. I swear I can taste the aspartame in certain beverages.

Anyway, I think the best thing about this meal is that it can easily be veganized! This week I taught two of my great friends that cheese contains rennet, this being enzymes needed in cheese that is combined with whey to make the cheese. Rennet however comes from the fourth stomach of a cow making cheese not as vegetarian as many people think it is. Goats cheese also has rennet in it. THOUGH there ARE vegetarian cheeses that do not contain rennet.

If you never knew, look to the labels! But now you know there are vegetarian versions of cheese.

If any of you end up making this dish, I hope you enjoy it!

Happy eating!

Lazy Mexican Sunday

The definition of lazy should be linked to my name. I can just imagine it. Flipping through one of the many dictionaries in our house and finding the word lazy which states this:

Lazy (n) – a person who is not very active such as Liselot.

Although the actual definition of lazy is an adjective, but hey! It could easily be a noun!

I have spent my day being lazy. Except I did make a delicious meal. If you like color like I do and you like a mixture of flavours in your mouth, this is truly for you.

Flautas de Pollo

How amazing does this look? I got the recipe from here, but as I used smaller wraps they didn’t quite take on the name of flautas or taquitos.

Ingredients:

  • 3 gorditas (small soft taco wraps)
  • 1 (238g) breast of chicken
  • ½ cup (74g) cheddar cheese, grated
  • Pinch of red pepper flakes
  • ½ an avocado, sliced

Pico de Gallo

  • ½ cup (74g)  tomatoes, chopped
  • ½ cup (74g) cucumber, chopped
  • ¼ cup (37g) red onion, chopped
  • 1 clove garlic, minced
  • ½ jalepeño, sliced and chopped
  • ¼ cup (37g) cilantro, chopped
  • 2 Tablespoons lemon juice
  • Salt and pepper to taste

Instructions:

  1. In a small frying pan, cook chicken breast thoroughly. Sprinkle with red pepper flakes and salt and pepper to add extra flavour.

  2. Turn oven to 175ᵒC (350ᵒF) and place three gorditas into oven for 4-6 minutes, while gorditas are warming up begin grating your cheese.

  3. Once chicken is cooked allow to cool and then begin to shred. When gorditas are warmed up, remove from oven and add shredded chicken to them. Top with cheddar cheese and wrap up (insert toothpick to ensure wrap won’t undo) and place back in oven for three minutes or until cheese has melted.

  4. During this time you can chop your tomatoes, cucumber, red onion, and jalepeño and place them into a small bowl. Mince your garlic and chop your cilantro and add that to the bowl as well. Squirt with about 2 Tablespoons worth of lemon juice and sprinkle with salt and pepper. Mix well.

  5. As you remove your “flautas” from the oven, open up and place a teaspoon or so of Pico de Gallo on top. Slice your half of an avocado and add two “strips” on top of your Pico de Gallo and re-wrap and enjoy!

IMG_4003 Pico de GalloWhen I first took a bite of the Pico de Gallo, I was so mystified by its taste. It was like heaven in my mouth. The spice from the jalepeños with the citrus from the lemon juice, the sweetness of the tomatoes, with the eye-watering tartness from the red onion – it was perfect! I haven’t had anything this wonderful in a while!

I immediately made two flautas and gobbled them all up. I can say that I am full now. But full and content. I am actually happy after that meal.

I definitely advise all of you to also make this as it is spectacular!

Anyway,

Buen provecho!

2 Meals for 1 Saturday Night

Its been a lazy Saturday for me, hopefully y’all have been a little more active.

Last week on Pinterest I saw a meal I was interested in making. It was meant to be my “Fatten Me Up Friday” meal, but it ended up being a Saturday thing. The reason I am calling it a fatten me up Friday type of meal is because it was a far cry from anything healthy. It’s a baked potato casserole. It looked like this when out of the oven:

Image
Fresh Out of the Oven Baked Potato Casserole

The recipe that I followed can be seen below, while the original recipe is here.

1 bag pre-washed and cubed potatoes, about 1lb or 500g
½ lb. boneless, skinless chicken breasts, diced
¾ cups shredded cheddar cheese
¾ cups shredded gruyère cheese
2 green onions, sliced (green parts only)
Salt and pepper to taste
½ cup heavy cream
1 tablespoons unsalted butter, cut into small pieces

Directions:

  1. Heat oven to 350ºF or 175ºC. Lightly grease a 9″ x 9″ baking pan or casserole dish. (I used a medium casserole dish, no idea what the actual measurements are)

  2. Spread half of the diced potatoes in bottom of pan. Place the diced chicken breasts evenly on top. Season chicken with salt and pepper. Add a third of each cup of the cheese, and half the green onions.

  3. Spread the remaining diced potatoes on top, add the rest of the chicken, another 1/3 cup cheese, remaining green onions and some more salt and pepper to taste.

  4. Pour heavy cream over top of casserole and then dot with the butter.

  5. Cover with aluminum foil and bake in the preheated oven for 1 hour. Uncover and bake another 30 minutes.

  6. In the last few minutes of baking, sprinkle with the remaining third a cup cheddar cheese and bake until melted. Serve.

It came out of the oven not looking all too bad. I however could not eat it.

Only in the past year have I learnt to be able to both cook and eat chicken. I have the most massive fear of raw poultry. It just scares me to bits thinking that I could become ill from eating cookie dough or brownie batter with a raw egg in it or when my chicken isn’t thoroughly cooked in my meal. So I would happily overcook my chicken any day. Although, when I would eat red meat several years ago I also had to make sure it was well done.

So, when I removed my casserole from the oven after an hour and a half/forty-five minutes, I checked my meal and it looked to me like my chicken wasn’t cooked enough. Mom reassured me that it was. She cut it and showed me that it was cooked all the way in and it cut like it was, it was just that the one side of the pieces looked pink. Mom then ended having the loaded baked potato casserole on her own with some extras of bacon.

I then decided to just make my own meal in 3 seconds basically. I turned the kettle on to boil some water as I pulled out some ramen noodles from the cupboard and made my own dinner.

Quick Ramen Meal

This is the recipe I followed for the above photo:

1 brick ramen noodles
½ cube vegetable bouillon
1 Tablespoon sesame oil
1 teaspoon less sodium soy sauce
1 egg, scrambled
 1 Tablespoon green onion, chopped
1 teaspoon sesame seeds, toasted

Directions:

  1. Boil water in a kettle, once whistling pour water into a glass bowl and put brick of ramen into bowl with ½ vegetable bouillon cube

  2. While ramen is being cooked till preferred consistency, heat tablespoon of sesame oil in small frying pan. Add teaspoon of soy sauce to sesame oil. Remove ramen from water and add to oil in pan and coat ramen with oil mixture.

  3. Once cooked remove ramen from frying pan and place on plate or in bowl. Wipe down frying pan quickly with paper towel. Next oil pan again (I just used the sesame oil again) and add egg. Scramble with spatula until cooked the way you like it. Add scrambled eggs to your noodle dish.

  4. Next using same pan on medium low heat, lightly sauté green onions. Once cooked top eggs with green onions.

  5. Finally add sesame seeds to same frying pan and cook until browned, then add to top all that is in the bowl.

  6. Grab some chopsticks (or a fork) and indulge in this quick masterpiece.

My ramen dish was definitely not made from an actual recipe. This was just me thinking of my Suriname friends by adding an egg to my meal as well as keeping life good with some protein. I must say, I definitely trusted my quick dish better than the crockpot meal. Luckily mom liked the first dish while I enjoyed my second.

So I have to say the meal turnout for me wasn’t all that bad. What do you say?

Landshark Gone Reindog

Oh, and here’s Austin. He is so not thrilled with having those candy cane themed antlers on his head, but doesn’t he just look the cutest? I’ve been taking photos of him like this all day long. If you are to go on my instagram (the photos in the side panel to the right of here) you will see more pictures of this cutiepie.

Anyway, hope you try the first recipe. Maybe if you follow the original recipe it will work out for you. If you don’t go for it then you can always try the second simple and quick recipe I put together.

Eet smakelijk!